Before taking up photography as a hobby, I had people in my life that loved talking about it, and I was always intrigued about how things worked, and remembering how optics kind of makes sense years after learning it. There was one technique they talked about in particular that I always thought was really cool and simple, it is called shaped bokeh.
The idea is to put a piece of paper with shape cut into it in front of the camera lens. When you do this, light that is out of focus assumes the shape that you cut, creating this nice little effect on all background lights, at the cost of a little bit darker picture(after all, you blocked some of the light with paper). The above picture has absolutely zero editing in it.
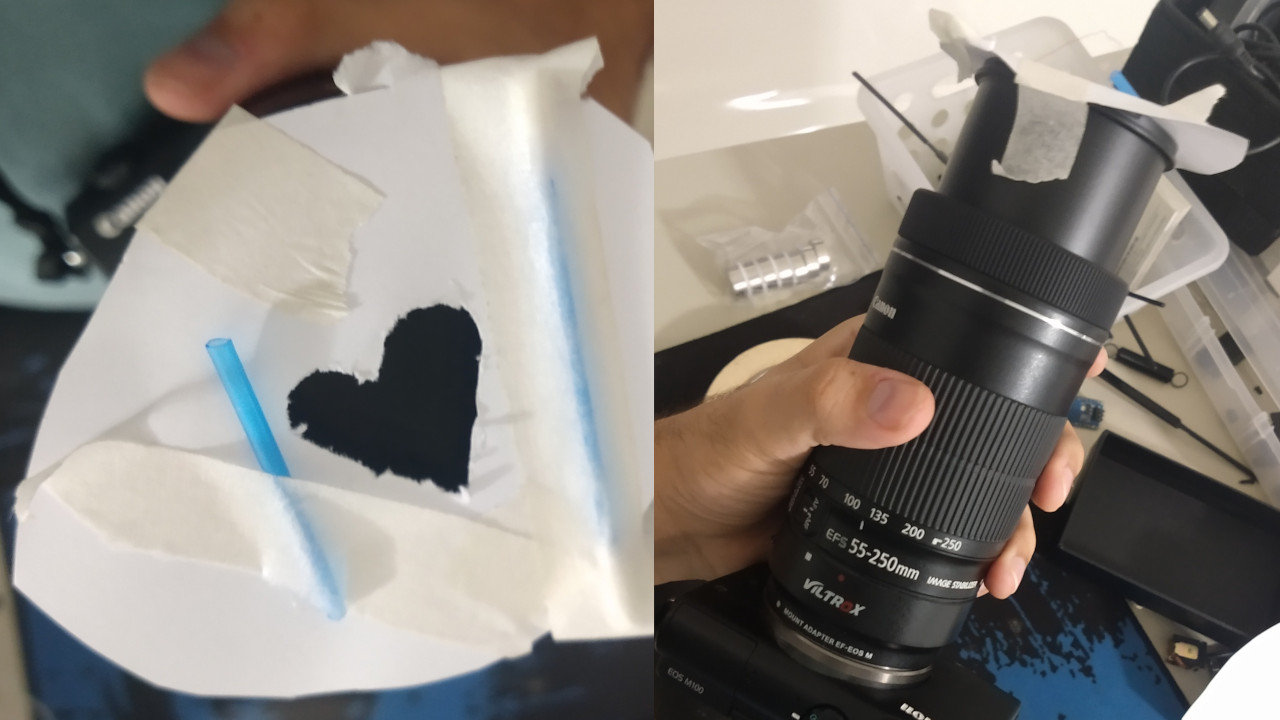
You can get away with such scuffed setups and get very cool effects, but I wanted to go beyond...
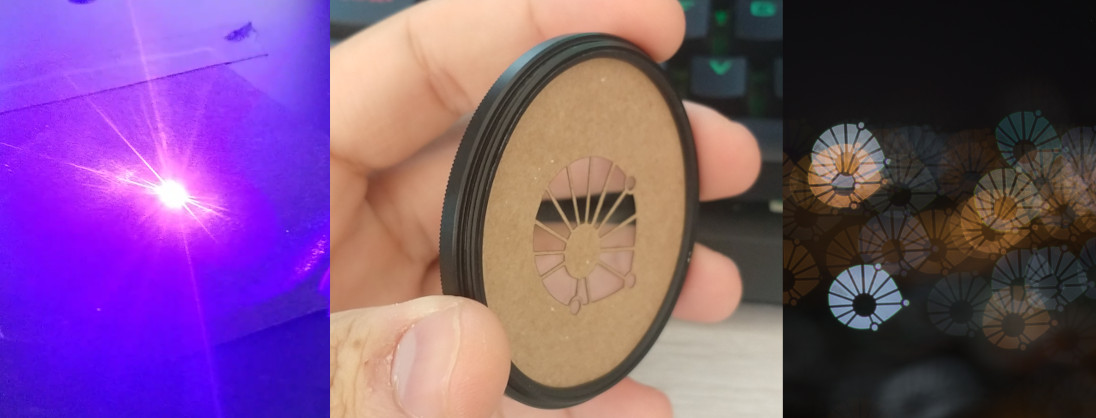
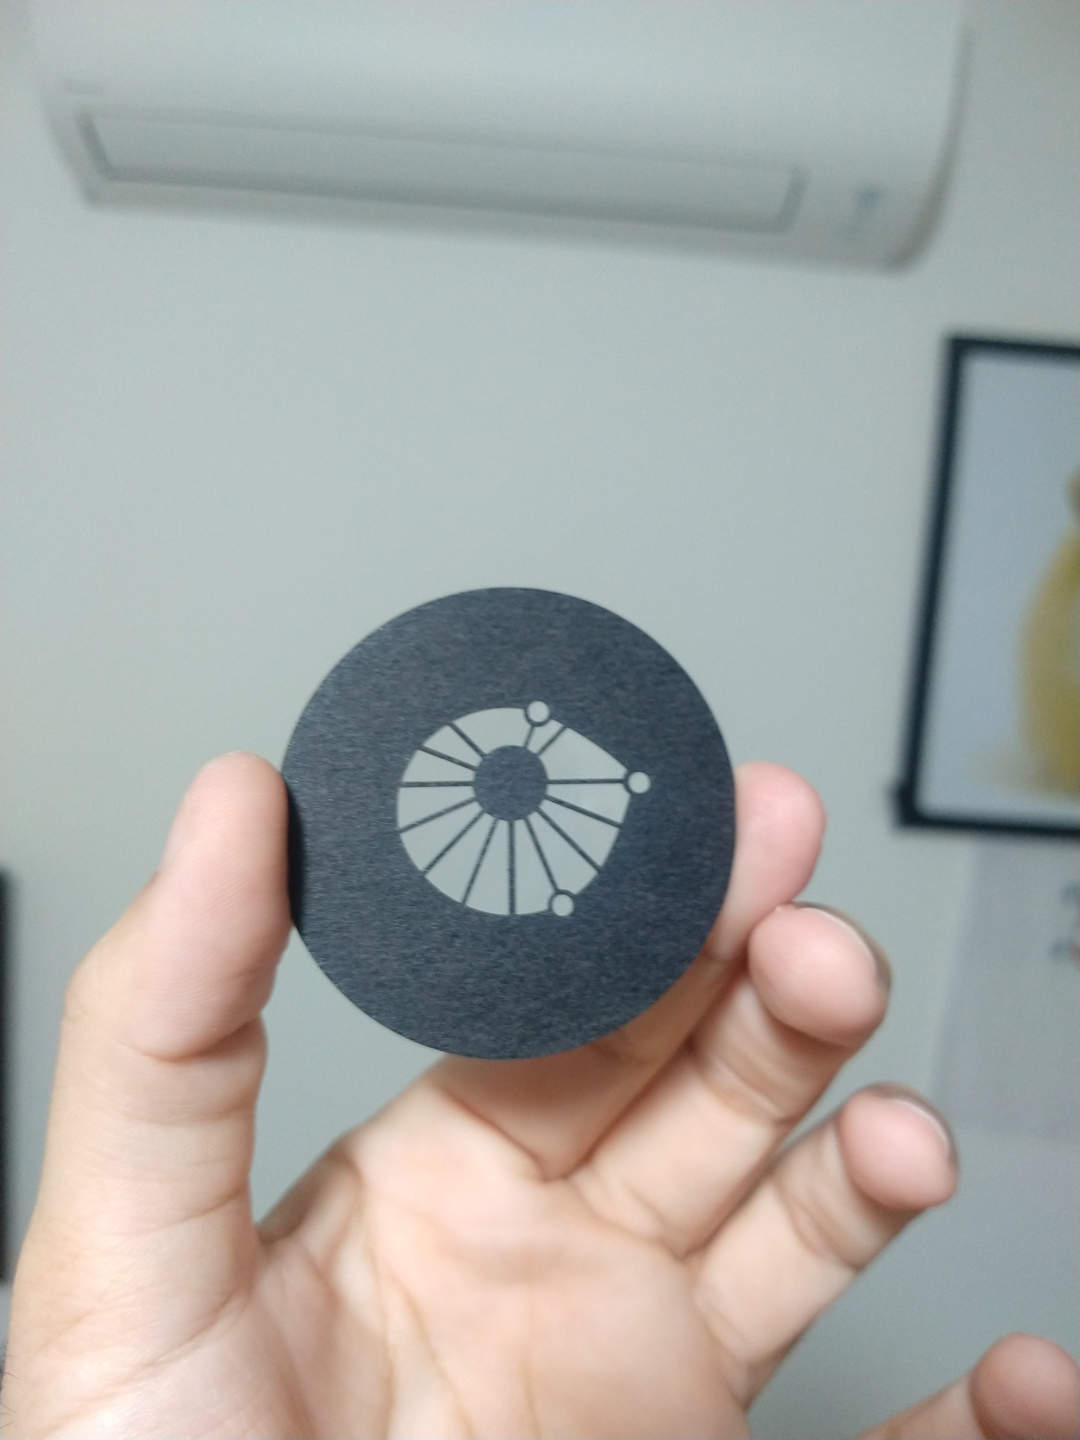
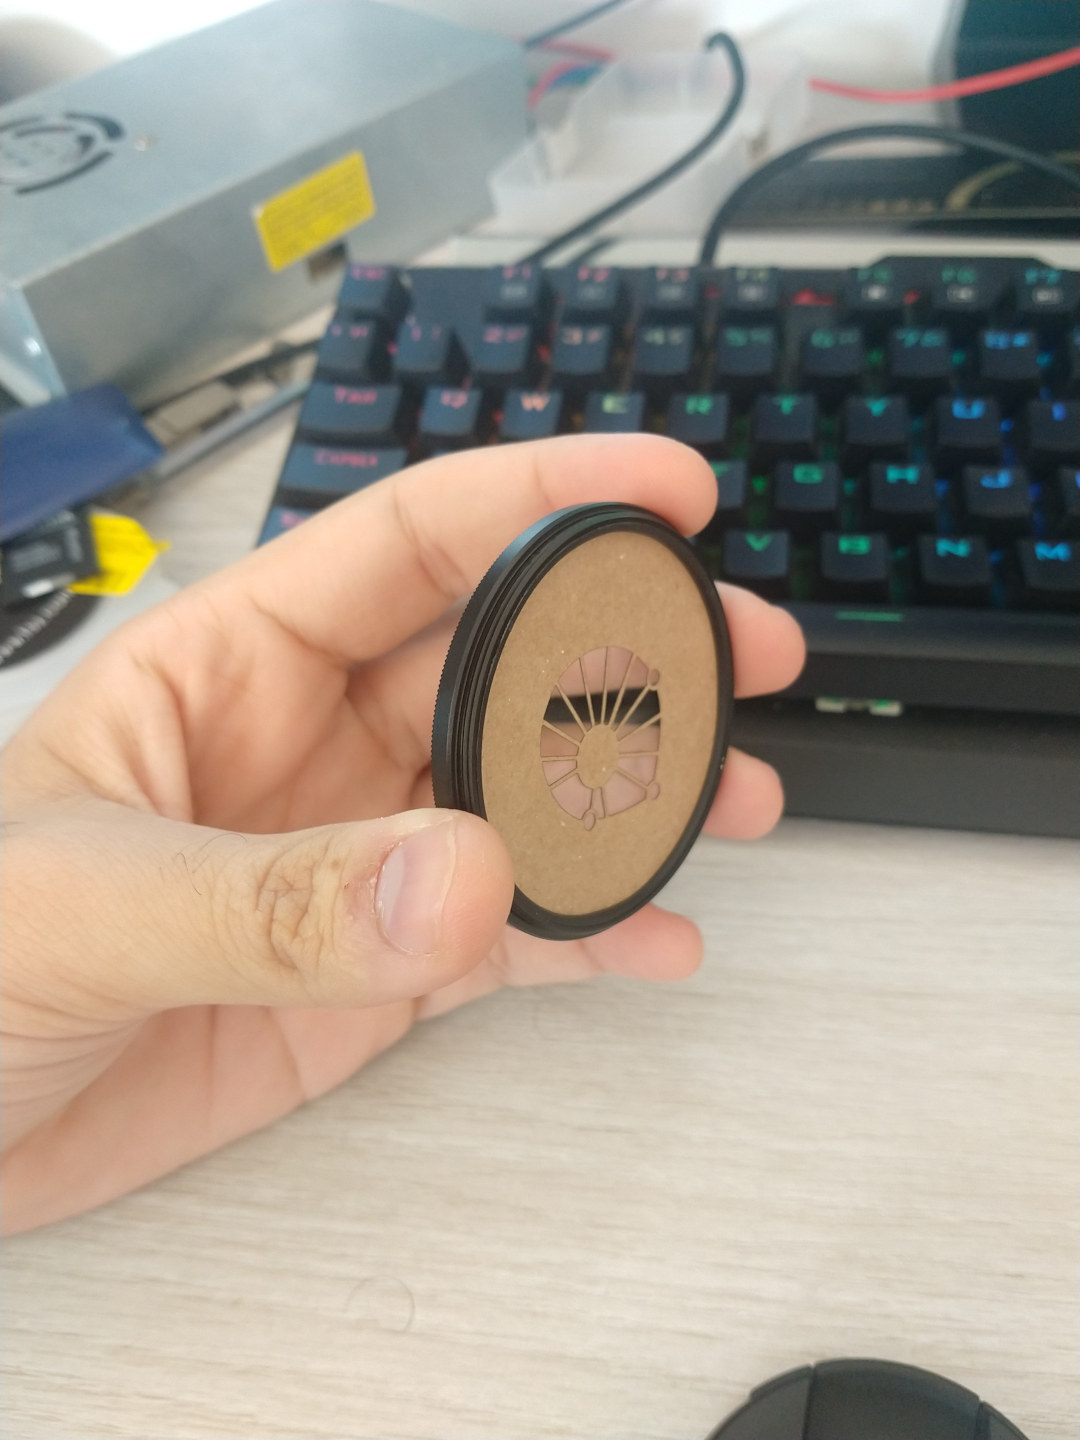
First, I got lenses that are actually good for this(high aperture size, things blur more easily). Then, my uncle taught me this trick for an excellent way to attach the filters to the lens, you just have to disassemble an UV filter, and fit the paper between the glass and the lock.

Lastly, but most important, I decided to put the laser on my CP-01 to good use. The laser on the CP-01 is strong enough to burn through paper, so I bought a piece of a paper that is a little bit denser so it wouldn't fold so easily, but not so thick that my laser wouldn't cut through and attached it to the bed with some tape.
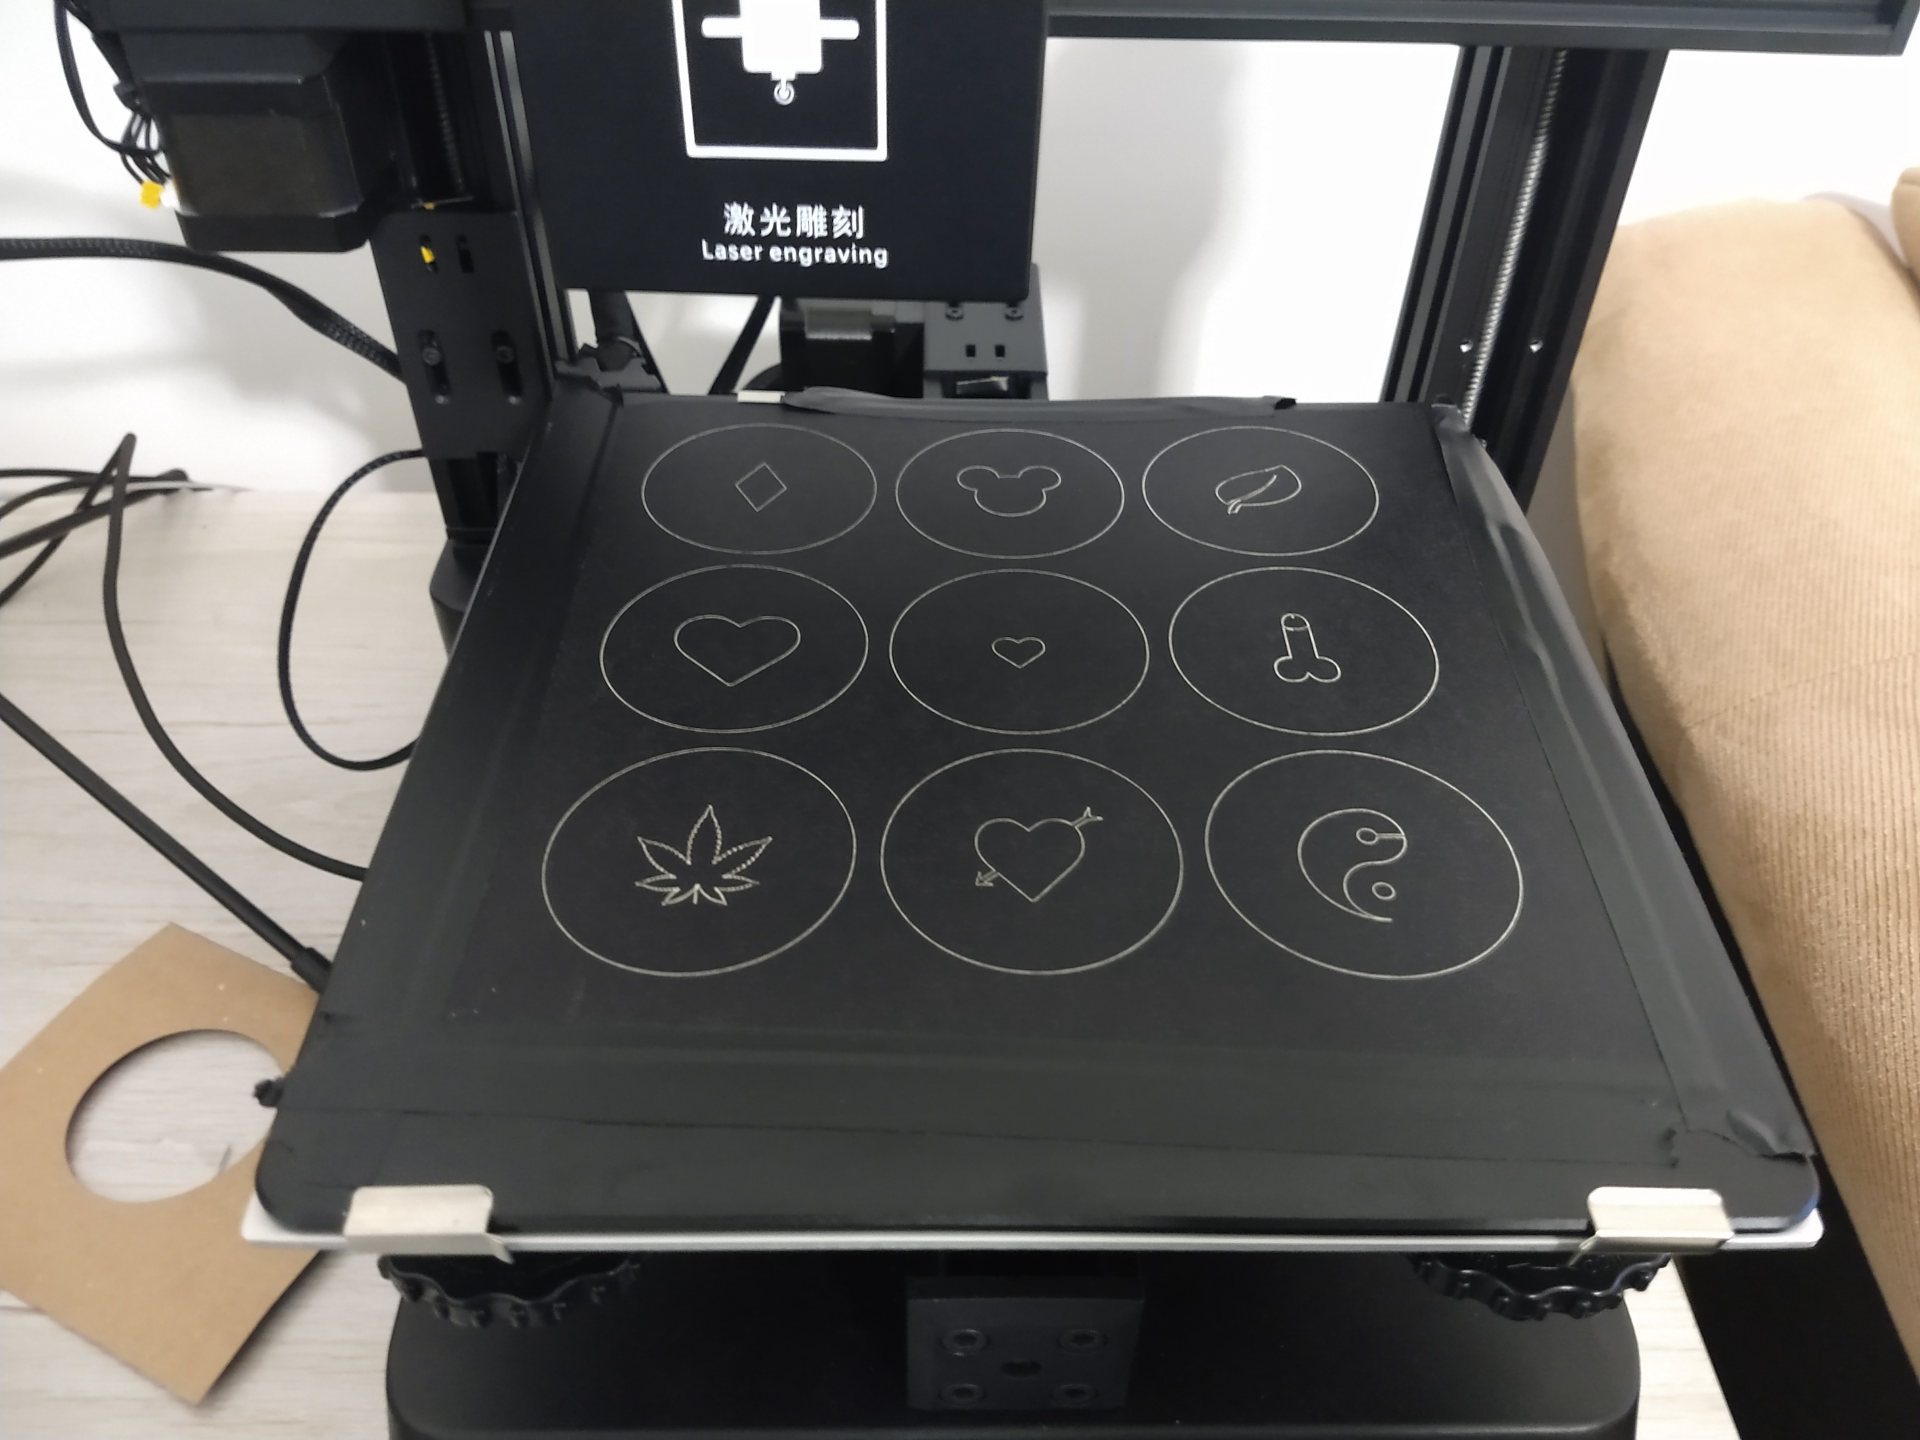
To design the shapes, I looked up vector graphics online, or designed some myself on Inkscape. To convert the svg files to gcode, I used LaserWeb. I could fit 9 circles of 58mm(the diameter of my lenses) on my print bed, each one had one of the shapes I wanted inside them, and after a little bit of tweaking on laser web(generating correct instructions, speeds, etc), I could manually set a good height on the print for focusing the laser and send it the generated gcode.
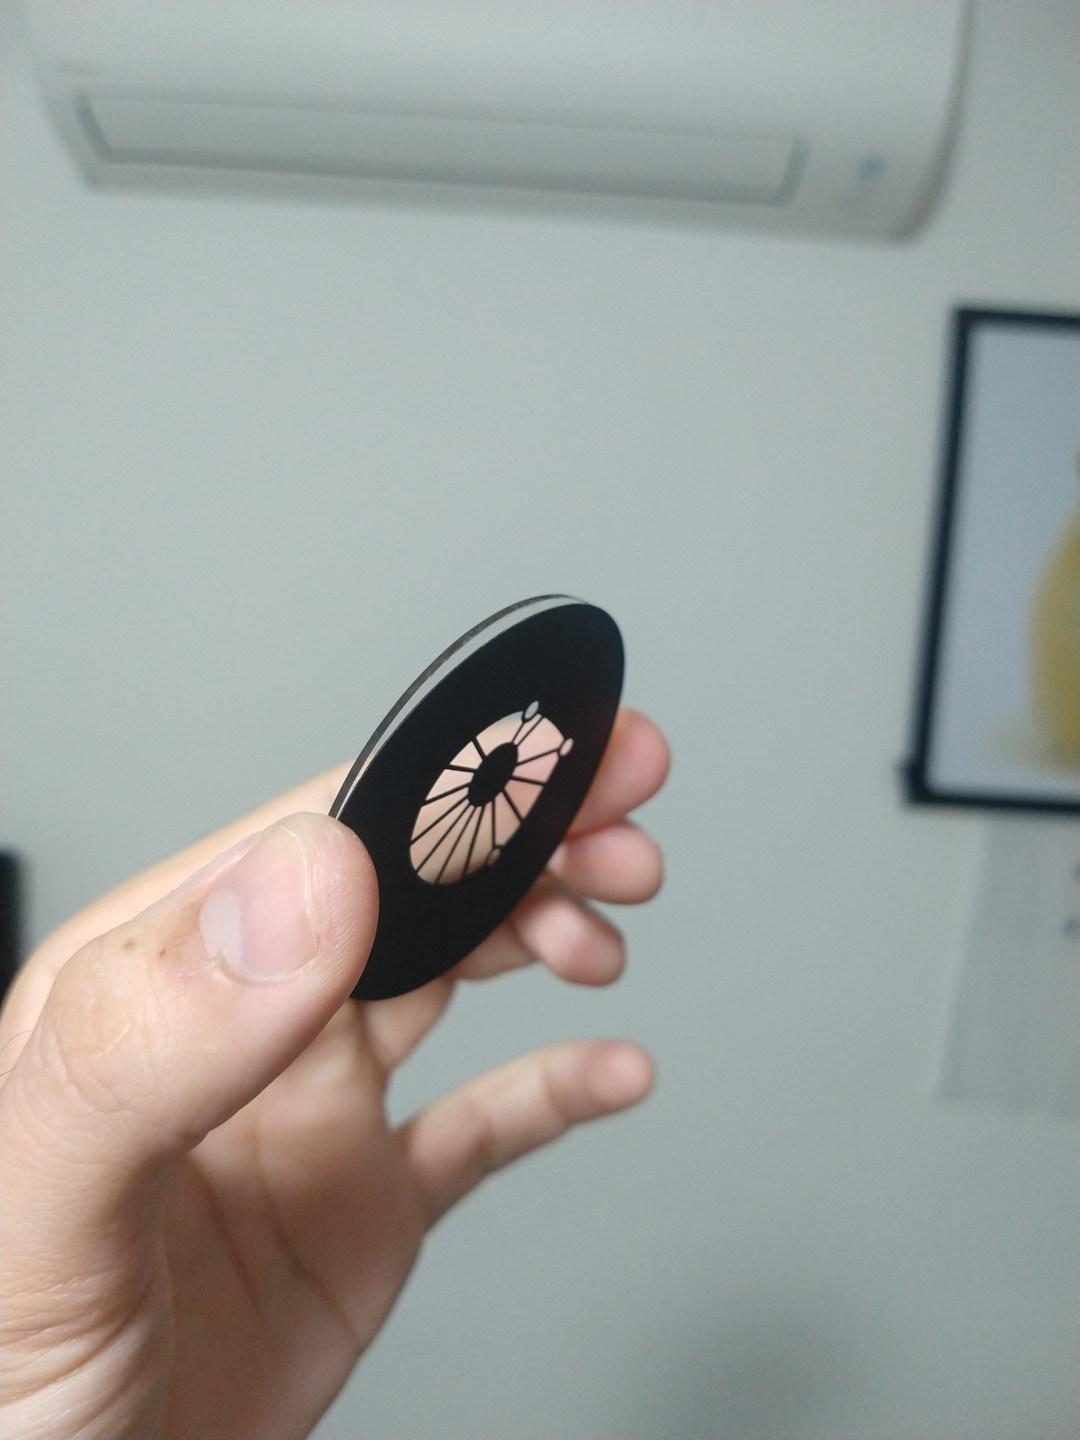
I actually had to cut the shapes multiple times, cleaning the paper between passes with a brush, since a layer of ash forms on the cuts, preventing the laser to cut deeper. But after that is done, we can contemplate the precision of a beautifully laser cut paper:

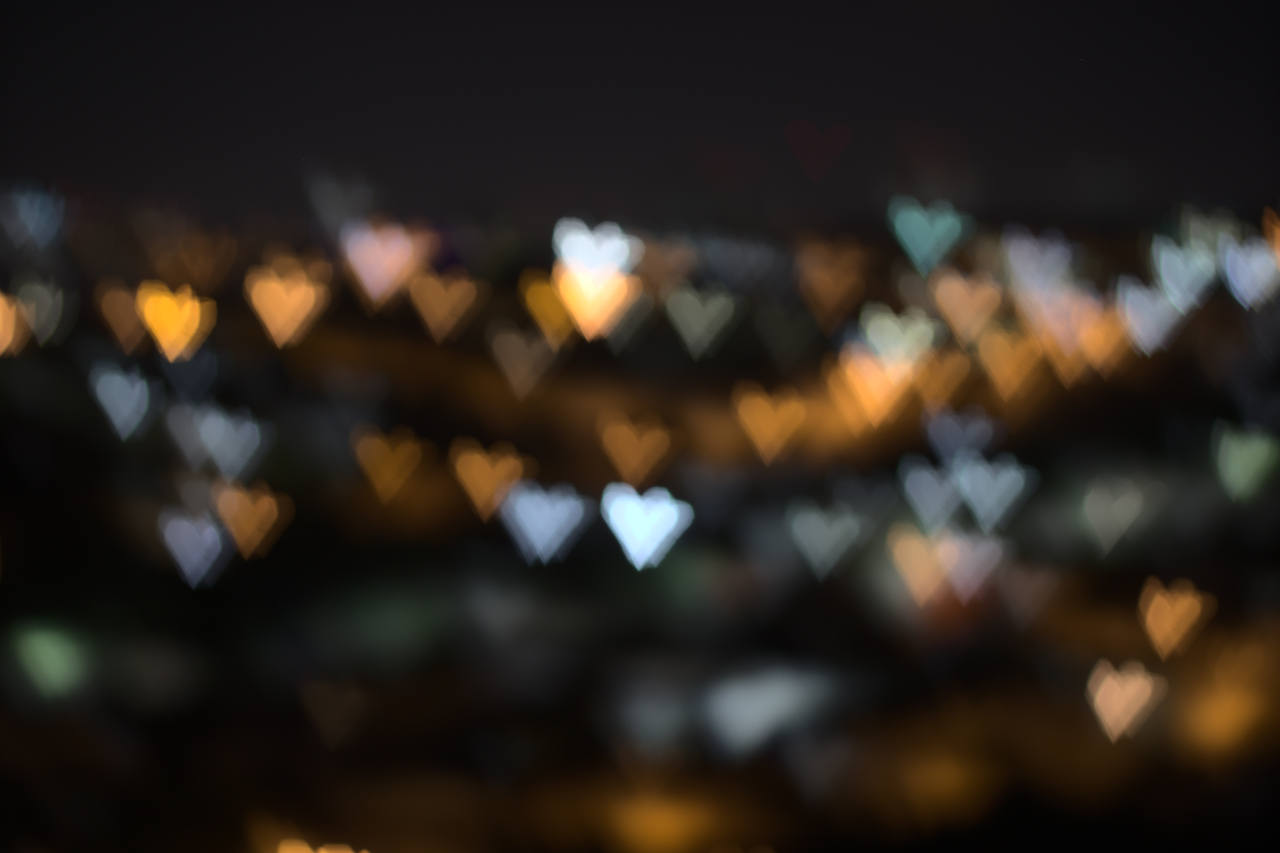
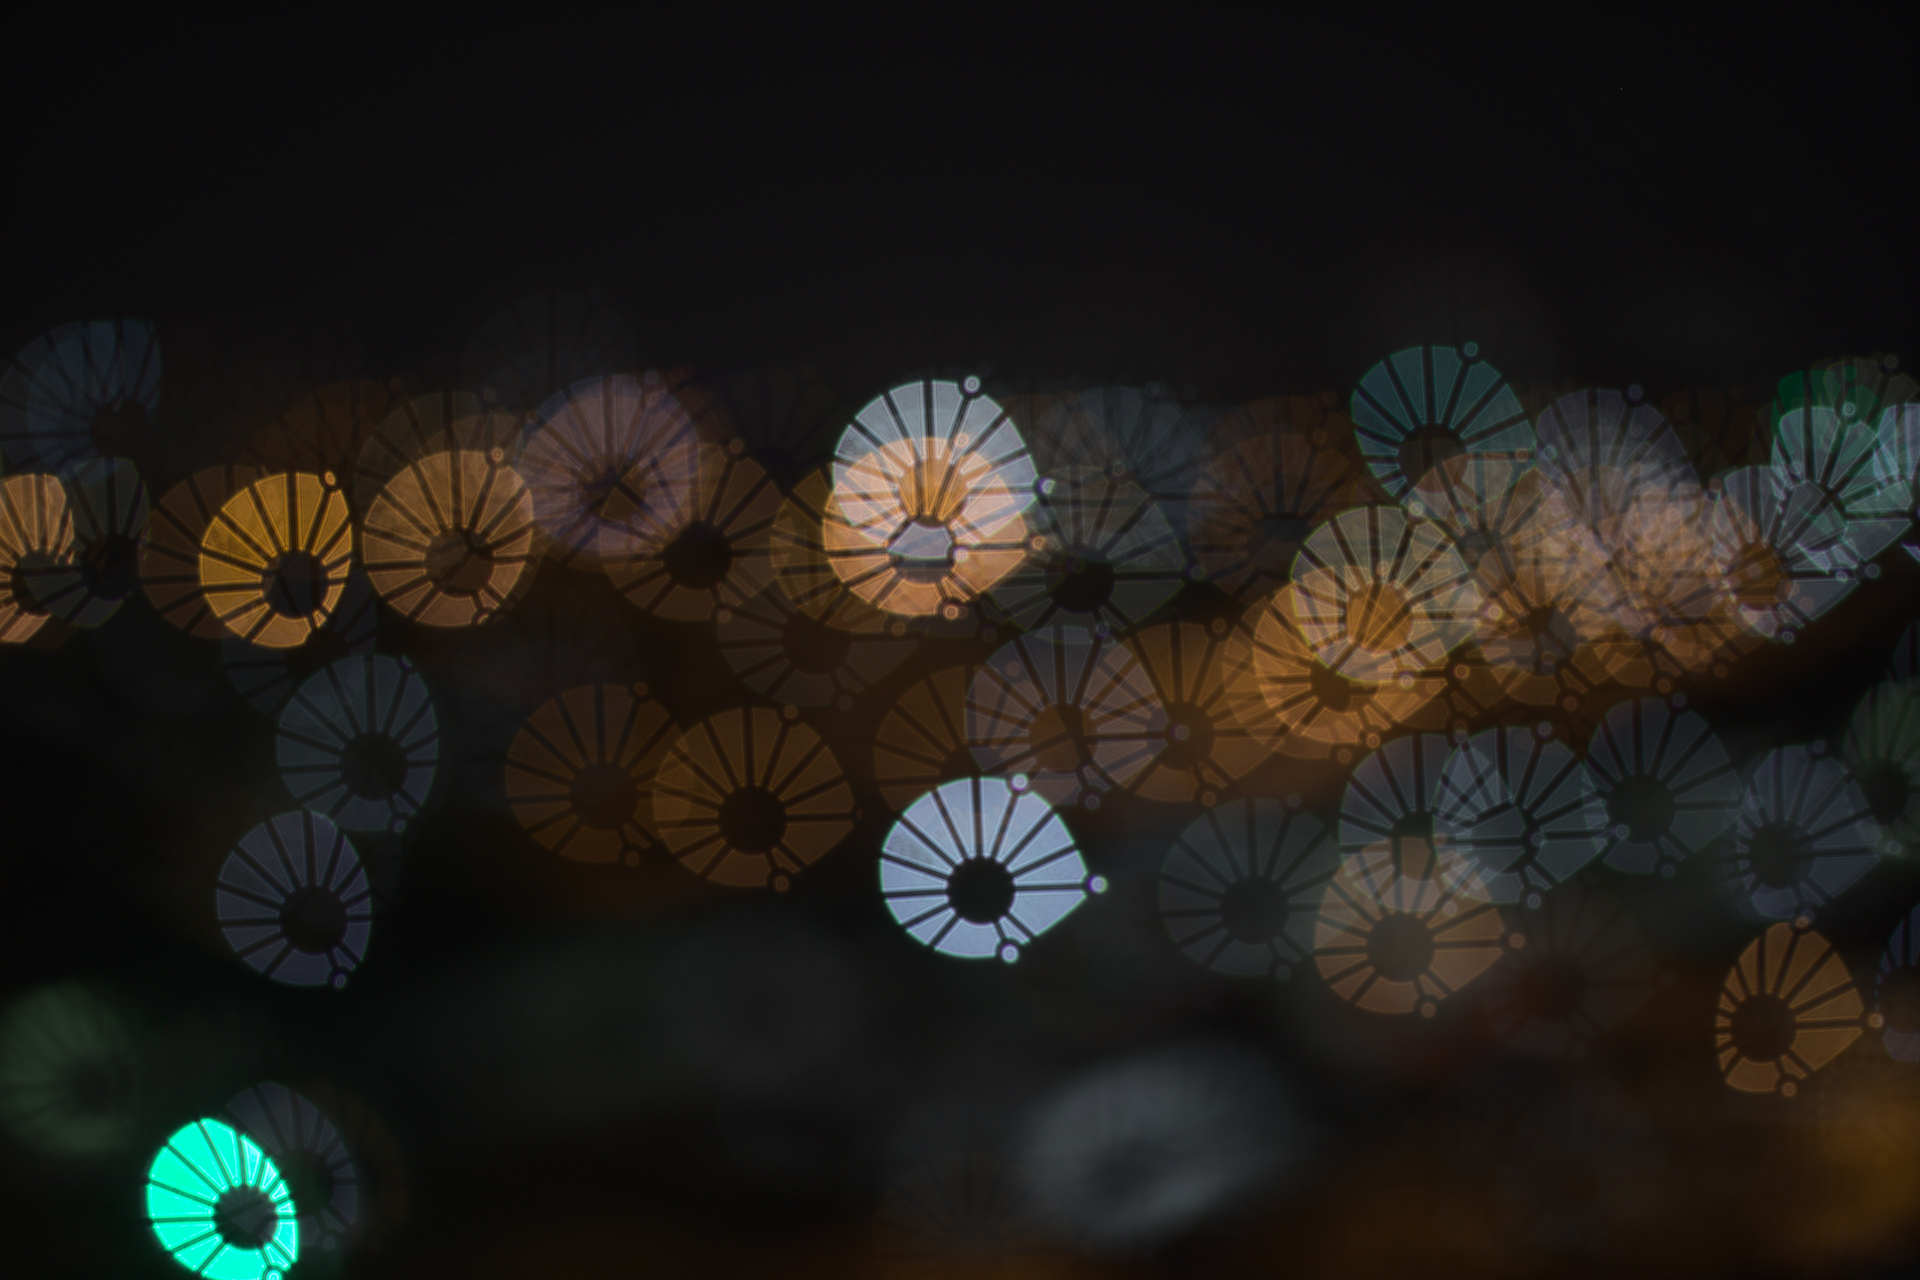
And then the results are pretty great, below there's a picture of the lights of the city out of focus, using the filter with my university symbol:
A finishing touch, changing the paper on the UV filter was very complicated, they were held in place by a plastic ring that required two tweezers to remove. I decided to 3D print an easier way to hold them in place, I printed this small open circle, that naturally would be tight inside the filter, but I can easily compress it to release the glass. It's easier to show how it works: